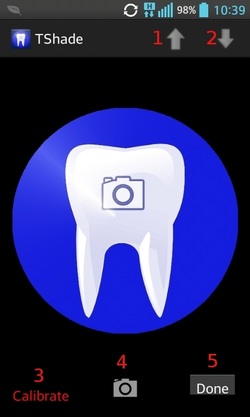
LEGEND
5. Press "Done" when check is completed. Result will be shown.
- Increase sample area
- Decrease sample area
- Status indicator:
- "Calibrate" (red): no calibration yet
- "Calibrate" (green): calibration completed
- "Check": check mode
5. Press "Done" when check is completed. Result will be shown.

|
TO GET STARTED
It's fundamental that you take the photo on which you will work in such a way as to have a uniform light without any shadows. Place the samples immediately below the incisor tooth of the patient (as shown here). Regarding the color temperature of the illuminant, it would be preferable the classic 5500 ° K, but it is not a categorical value. To get started, you have two options:
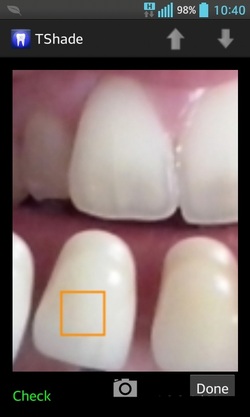
First, you will need to do the calibration. The calibration must be done on the tooth of the patient (generally the upper incisor). After adjusting the image (with zoom and drag) so that you can easily select an area of the tooth, touch the tooth (you can choose gingival, median or incisal zone). You will see a red square. This represents the sampled area. In case you consider the sampled area too small, or too large, this can be reduced or increased (within certain limits) using the two arrows at the top (1 and 2 in the legend). NOTE: When you are in calibration mode, if you change the sampling area with the arrows, the square will become dashed and the calibration must be repeated. When the calibration is completed, the text on the bottom left will turn green, and a box will appear for a short time with the values L, a, b (CIELab color space). |
|
CHECK PHASE
Once the calibration is done , you can move on to check . To setup this step, select the menu ( the menu button on your smartphone ) and click on "Check" . The text at the bottom left will show the status "Check" . At this point, scrolling through the image , touch each sample which you want to check against the patient's tooth . If the check square is found to be too small, or too large, use the arrows at the top to change it. NOTE : When you are in the process of checking , if you change the area to check the last check will be canceled ( example: suppose that you have already checked 5 sample-teeth; changing with the arrows the area to check , the fifth check will be canceled) and the square will appear dashed . In case you make any unintentional mistakes in selecting one or more areas to check , you can reset the check phase by selecting the menu item " Clean check table" and repeat the procedure (no need to recalibrate ) . Once you have selected all the sample-teeth , select (on screen) "Done" . A dialog window will appear with the result. |
|
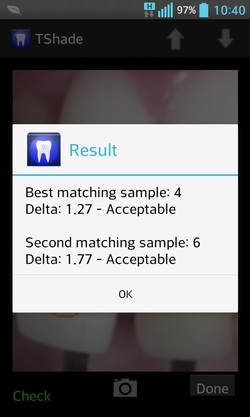
CHECK RESULT
The dialog window will show the best match and the second best match. "Delta" is the color difference (between the sample and the specific patient's tooth). If delta is less than or equal to 1.25, the difference will be imperceptible. If delta is between 1:25 and 2:25, the difference will be acceptable. In the case of a delta greater than 2.25, however, the sample that most closely matches the color of the patient's tooth will be indicated along with the second best sample. By clicking "OK", we note that two circles have been inserted in the image, corresponding to the best match and to the second best match. The first one will be green, the second one will be orange (see picture below). |
|
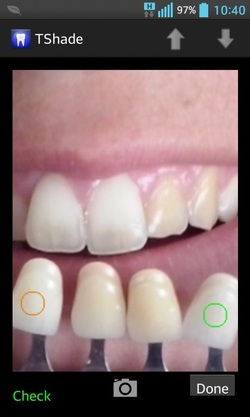
SAVE PICTURE
This photo shows the result, with circles. At this point, you may want to save the photo, for examination later. To save the picture, click the menu and select "Save Image". You can enter the name of the file (you may want to use -for example- the surname of your customer). NOTE: This app will save the last picture taken ("tshade_photo.jpg") and photos "post-check" in the album "TShade." In addition, every shot will be saved automatically (by the system) in the gallery. |
